 Number 311 - April 2009 |

|
| How to Copy Contents of One Hard Drive to a New Hard Drive | |
| from Internet's wikiHow | |
|
Connect a new (optionally larger) hard drive to a PC and place an exact copy of an existing drive to it. The new drive will be identical to the original, and bootable (if the source was), too. As a result, the new drive may replace the old drive, kept as additional storage or removed from the PC for a different use completely. 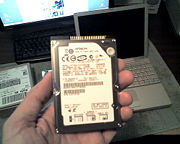
Steps 1. Read this entire wiki (including all Tips and Warnings) before beginning. 2. Decide from which drive the PC will boot. 3. Determine IDE controller interface type. Several types are made: SCSI, IDE and others. This wiki will discuss two of the most common types: parallel (PATA) and serial (SATA) IDE types. 4. Locate or create the hard drive "set up" or "installation" diskette or CD (see the "Tips" section below for clickable links). Download the latest version of this software from the hard drive manufacturer's website if the software was not included with the drive. Create media for use on a drive supported by the PC if downloaded from a website. A diskette image will not work if there is no diskette drive installed in the PC. 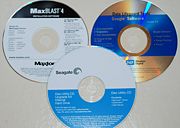
Set up or install CD-ROM disks included in retail hard drive packages. Hard drives packaged for OEM use generally do not include software. 5. Insert the setup disk(ette) into the corresponding drive in the PC that will have the new hard drive. 6. Locate or download documentation for the PC's hard drives. If a CD-ROM disk (or CD image download) version of the manufacturer's hard drive setup program has been loaded in the PC drive, the information is likely included on the disk. Diskette versions will not likely have this information due to space limitations. Print the drive information along with this wiki for referral later, when the PC is off. This information may be needed to correctly set jumpers if not printed on the hard drive label. Indicate the make and model of the existing and new drive on the print out. 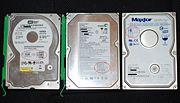
Three popular drive manufacturers Western Digital, Seagate & Maxtor.Jumper configuration is red circled on the label.> 7. Log out and shut power off. 8. Determine and change (if needed) the existing boot order (disconnection and removal of existing drives from the case might be required to view and change jumpers) with one of the methods below: Parallel IDE drives (called PATA, IDE or PIDE) are set by jumpers on the drive and position of connection on IDE cables. Choose from the types described below: 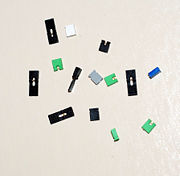
A collection of jumpers of different colors and types 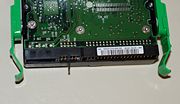
Jumper positions printed near the jumper header. This drive is set for "Master" but can easily be changed to either of the other two types by simply removing the jumper from the Master position, and placing over the pins for "Slave" or "Cable Select" (CS). 
PATA cable for IDE drives. This cable is used to transfer data to and from a PATA drive. If two parallel cables are available, determine if the cables have 40 or 80 conductors. If an 80 conductor cable is available, use it to connect the hard drives and the 40 conductor cable to connect a CD-ROM or DVD-ROM drive. Either cable will work, but the 80 conductor cable will work at a higher speeds than the 40 conductor cable. Both 80 (top) and 40 (bottom) conductor HDD cables are shown in this image. |
SATA drives do not have jumpers to indicate master or slave. Drive identification is done by connecting the boot drive to the lowest numbered SATA connection on the motherboard (or SATA controller board). Since the SATA interface cable has only one connector on each end, drive identification numbers are not needed, but determined by the number assigned to the SATA port to which it is connected. One end of the SATA cable connects to the drive and the other to the motherboard (or SATA controller board). The boot drive should not be connected to the connection point labeled SATA0 (or the lowest numbered SATA port on your mother board), and the non-boot drive connected to the next higher available SATA number point. 9. Connect both the data cable (PATA or SATA) and the power cable to each drive. A drive without both connections will not be identified or available for use. 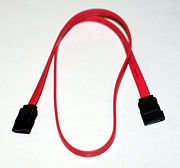
SATA cable for IDE drives. This cable is used to transfer data to and from a SATA drive. 10. Reinstall the drives with only enough screws to support the drives, as they might have to be removed again to change settings, etc. The drive installation will be finalized later, when the process is complete. 11. Access the PC's BIOS. Verify that the PC has successfully recognized all drives. Take corrective action should the PC have issues recognizing any drive. The drive documentation will assist solving these problems. It is very important to note the sizes of the drives, as later, in the installation and copy process, the drives will not have the familiar names like C or D. Knowing the drive that has data and the drive that is empty will be crucial to copy data correctly. 12. Confirm and change (if needed) the boot order to allow the PC to boot from the drive that contains the media in the previous step. 13. Save and exit the BIOS set up page. The PC will begin the boot process from the new "set up" or "install" media. 14. Follow the process to install or verify the installation. The screen should show the information about all the drives connected. Compare the data on the screen to what was written on the print out earlier. Make sure the information matches. This is when knowing how to identify the source (the drive with data to be copied from) and destination (the drive to receive the data) will be required. If unsure about source and destination drives, STOP. If the wrong choices are made, the wrong data will overwrite the "good data", rendering the information lost. If satisfied with the identifi- cation of the drives, continue the setup of the new drive. 15. Locate the "drive to drive copy" option. Copy the source drive to the destination drive. The time needed to complete the copy process depends on the amount of data stored on the source drive. The destination drive must be larger than the source drive. 16. Checkout and return BIOS settings to original. Upon completion, remove the media from the drive (if not already done), and reboot as normal. Interrupt the boot process to access the BIOS setting page as before. Return settings (boot device order in particular) to original settings, then save and exit. The PC should boot (from the new drive if set as the first boot device). Check the contents of both drives after booting into Windows (or other OS). Once satisfied, the original disk may be erased, formatted or even removed (after shutting down the PC). If removing, the drive can be saved with contents intact for disaster recovery or erased and installed in a portable case for use as an external drive. 17. Secure all drives in the PC case. Route cables so that they will disrupt air flow the least, and replace covers on the PC case. There is a video on the site that shows how to perform a simple file copy from an internal drive to an external hard drive. Copying files in this fashion (even from an internal bootable drive to another internal destination drive) will not make the destination drive bootable. If creating an exact copy of bootable drive is the goal, the "set up" or "install" program that was downloaded or found on the CD, will accomplish this very easily. Tips Download the latest software whenever possible. Manufacturers are constantly updating the "set up" or installation software. Western Digital's "Data Lifeguard Tools 11.2 for Windows" for example (their Windows set up software), allows a new disk to merely be added to the system as a primary (IDE0 port) slave or secondary (IDE1 port) master or slave. Boot the PC to boot into Windows as usual. Then, run the "set up" where it will partition, format and optionally copy a disk. When complete, connecting the newly copied drive to IDE0 as a master (via M/S or CS jumper setting) will allow the PC to boot from the new drive. Download software for these popular manufacturers: Western Digital, Seagate and Maxtor. Gain more space by replacing a boot drive with a larger hard drive. Allow the old drive function as additional storage, a Windows "swap drive", or remove it from the PC and install in an external case for portable use. Warnings |
|
Number 311 - April 2009
|
|